If you're in the San Diego area, I'll be speaking at the San Diego .NET User Group tomorrow night (March 27th). Details are available here: San Diego .NET User Group.
The topic is "Learn the Lingo: Design Patterns". We'll be taking a look at what patterns are and why we should become familiar with them. In addition to looking at several Gang of Four patterns, I'll show some commonly used patterns like the Repository, Inversion of Control (IoC), and Model-View-ViewModel (MVVM). Lots of fun in store; hope to see you there.
Happy Coding!
Monday, March 26, 2012
Sunday, March 25, 2012
Updating an Interface Implementation
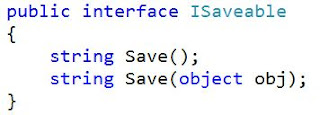
A little while back, we saw how we could implement interfaces explicitly in Visual Studio (Explicit Interface Implementation). We saw how Visual Studio helps us implement an interface. Consider the following interface:

After creating a class (called "Implementation") that declares that it implements this interface, put the cursor in "ISaveable". Then we see that we get the clue (with the small blue box under the "I") that Visual Studio wants to help us. If we press Control and the dot (Ctrl+.), then we get a popup to help us.

By selecting "Implement interface 'ISaveable'", we get the interface stubbed out. Note that we can get similar behavior by right-clicking on "ISaveable" and selecting "Implement Interface" and then "Implement Interface" again. Also, if you run a refactoring tool (such as ReSharper), you will be given similar options through that tool.

Now that the interface is implemented (i.e., the contract is fulfilled), Visual Studio behaves a little differently. If we right-click now, and select "Implement Interface", we will only see the option to explicitly implement the interface. Because the non-explicit interface is already implemented, Visual Studio does not even give us that option.
But What if the Interface Changes?
But what if there are changes to the interface? Let's say that another method was added to the interface:
Now if we go back to our "Implementation" class, we will see that the option to "Implement Interface" is back (for both the right-click and "Ctrl+." options). If we select this option, then it will add any interface members that aren't already implemented. In this case, it will add the Save method that takes the object parameter.
Don't Update an Interface in the Wild
An interface is a contract. If you were to update an interface (by adding members or changing existing members), then existing classes that implement that interface will break. Those classes will no longer build. Because of this, we should only consider changing an interface if we have not yet released it. After we have released it, we should assume that there are classes that implement the interface and that those classes will break.
If we're still in the development cycle, then we will most likely go through many different iterations of the interface. That's to be expected. But we need to be confident that the interface is complete when we release it for use by other developers.
Another Option - Combining Interfaces
But we have another option. Rather than changing the existing interface, we can create a new interface that inherits the original members. In our sample interface, it would look something like this:
 Now we have a new interface "IObjSaveable" that includes all of the members of "ISaveable", plus it's own members. This means that any existing classes that implement ISaveable will continue to work as expected. For classes that need the extended functionality, they can implement IObjSaveable. If we choose to "Implement Interface" on IObjSaveable, we get both save methods:

Contracts are Contracts
Interfaces are contracts. To keep up our side of the contract (as the interface designer), we need to make sure that we are not changing the interface once we've released it for use. But as we've seen, we can create new interfaces that include the members of other interfaces. If you look at the Visual Studio help files, you will see that IList, ICollection, and IEnumerable do just that (ICollection includes IEnumerable and IList includes ICollection). We can follow this same pattern to make sure that our code is well abstracted and extensible.
Happy Coding!

After creating a class (called "Implementation") that declares that it implements this interface, put the cursor in "ISaveable". Then we see that we get the clue (with the small blue box under the "I") that Visual Studio wants to help us. If we press Control and the dot (Ctrl+.), then we get a popup to help us.

By selecting "Implement interface 'ISaveable'", we get the interface stubbed out. Note that we can get similar behavior by right-clicking on "ISaveable" and selecting "Implement Interface" and then "Implement Interface" again. Also, if you run a refactoring tool (such as ReSharper), you will be given similar options through that tool.

Now that the interface is implemented (i.e., the contract is fulfilled), Visual Studio behaves a little differently. If we right-click now, and select "Implement Interface", we will only see the option to explicitly implement the interface. Because the non-explicit interface is already implemented, Visual Studio does not even give us that option.
But What if the Interface Changes?
But what if there are changes to the interface? Let's say that another method was added to the interface:

Now if we go back to our "Implementation" class, we will see that the option to "Implement Interface" is back (for both the right-click and "Ctrl+." options). If we select this option, then it will add any interface members that aren't already implemented. In this case, it will add the Save method that takes the object parameter.
Don't Update an Interface in the Wild
An interface is a contract. If you were to update an interface (by adding members or changing existing members), then existing classes that implement that interface will break. Those classes will no longer build. Because of this, we should only consider changing an interface if we have not yet released it. After we have released it, we should assume that there are classes that implement the interface and that those classes will break.
If we're still in the development cycle, then we will most likely go through many different iterations of the interface. That's to be expected. But we need to be confident that the interface is complete when we release it for use by other developers.
Another Option - Combining Interfaces
But we have another option. Rather than changing the existing interface, we can create a new interface that inherits the original members. In our sample interface, it would look something like this:


Contracts are Contracts
Interfaces are contracts. To keep up our side of the contract (as the interface designer), we need to make sure that we are not changing the interface once we've released it for use. But as we've seen, we can create new interfaces that include the members of other interfaces. If you look at the Visual Studio help files, you will see that IList, ICollection, and IEnumerable do just that (ICollection includes IEnumerable and IList includes ICollection). We can follow this same pattern to make sure that our code is well abstracted and extensible.
Happy Coding!
Tuesday, March 20, 2012
San Gabriel Valley .NET Developers Group
I'll be speaking at the San Gabriel Valley .NET Developers Group in Monrovia, CA on Wednesday night (March 21st). Details and directions are available here: San Gabriel Valley .NET Developers Group
If you're in the area, be sure to stop by. Hope to see you there!
Happy Coding!
If you're in the area, be sure to stop by. Hope to see you there!
Happy Coding!
Monday, March 19, 2012
Explicit Interface Implementation
In my session on .NET Interfaces (IEnumerable, ISaveable, IDontGetIt: Interfaces in .NET) we take a look at how to create and use interfaces. But one question comes up repeatedly: When you let Visual Studio help you implement an interface (by right-clicking on the interface name), you get the option to "Implement Interface" or "Implement Interface Explicitly" -- so what does it mean to explicitly implement an interface?
Let's take a look. As we'll see, explicit implementation is generally optional; it all depends on what we are trying to do with the code.
Multiple Interfaces Using the Same Implementation
One reason people think we need to explicitly implement interfaces is if we have two interfaces with duplicate members (that is, one or more members that have the same method signature in each interface). Let's consider the following interfaces:

For this, we have 2 different interfaces that both contain the same method signature. Your first reaction may be that if we have a single class that implements both interfaces, we need to implement them explicitly to avoid the name conflict. But that is not necessarily the case.
Here is a sample implementation:

What we see here is a single implementation of the "Save" method. And that may be perfectly acceptable. Let's think about this for a moment. All we really care about is that the contract is fulfilled with the interfaces -- that is, that the class implements the members that are specified by the interfaces. If it turns out that the Save method of ISaveable and the Save method of IPersistable can have the same implementation in our class, then that's perfectly fine. The interfaces just care that the Save method is there.
To see that everything is fine, let's put together a quick console app that shows the different ways that we can call the Save method:

The first section creates 3 variables -- one each for the Implementation class, the ISaveable interface, and the IPersistable interface. The first three WriteLine calls show the output of calling Save with each of these variables.
The last three WriteLine calls show what happens when we cast the Implementation class to the interface and then call Save. Our output from this app is no real surprise:

Since we only have a single Save implementation, that is the output for each of the calls. Again, if this meets our functional needs, then we do not need to explicitly implement the interfaces.
Explicit Implementation
If we decide that the functionality for the interface implementations need to be different, then we can explicitly implement the interface. If we were to do this for both interfaces of our Implementation class, it would look something like this:

If you right-click on "ISaveable" and select "Explicitly Implement Interface", you will get the "string ISaveable.Save()" stub. If we do the same for the IPersistable interface, we end up with three different implementations of the Save method.
Let's take a look at the output from our console app now (the code for the console app remains the same, only the Implementation class has been updated):

Notice the difference. If we call Save on the "Implementation" variable, we get different results than if we call Save on the "ISaveable" variable or the "IPersistable" variable. The same is true if we take our "Implementation" variable and cast it to the different interface types.
We can also mix-and-match the non-explicit and explicit implementation. If we wanted, we could explicitly implement some members, but not others. The non-explicit implementations would behave like the previous sample (where we had no explicit implementations) and the explicit would behave like this sample.
Explicit Implementation May Be Required
In the samples above, explicit implementation is optional -- it is dependent upon our business needs. But there are situations where explicit implementation may be required. What if the signatures of the interface members don't quite match?

Notice that one of the Save methods returns void and the other returns string. This means that we would run into problems if we tried to do a non-explicit implementation. That's because we are not allowed to overload methods in a class based on the return types alone; they need different parameters in order to be overloaded. This means that in our implementation we must have at least one explicit implementation:

Here we have explicitly implemented the IPersistable Save method. In this case, we are simply calling the main Save method (which has the ISaveable signature) because our functionality is the same for our simple example.
Wrap Up
So, what we've seen is that implementing an interface explicitly is optional in a number of situations. If the implementation is the same, then we can just use a non-explicit implementation. Explicit implementation allows us to have different functionality for each interface implementation, and it also allows us to disambiguate interface members that may have signatures that differ in return value only.
Interfaces are a powerful tool in the .NET developer's toolbox. They allow us to add abstraction to our code, let our code be more extensible, and add seams to our code that can facilitate fakes and mocks for unit testing. Explicit implementation is another aspect of interfaces that we can use when we have multiple interfaces with the same or similar members.
Happy Coding!
Let's take a look. As we'll see, explicit implementation is generally optional; it all depends on what we are trying to do with the code.
Multiple Interfaces Using the Same Implementation
One reason people think we need to explicitly implement interfaces is if we have two interfaces with duplicate members (that is, one or more members that have the same method signature in each interface). Let's consider the following interfaces:

For this, we have 2 different interfaces that both contain the same method signature. Your first reaction may be that if we have a single class that implements both interfaces, we need to implement them explicitly to avoid the name conflict. But that is not necessarily the case.
Here is a sample implementation:

What we see here is a single implementation of the "Save" method. And that may be perfectly acceptable. Let's think about this for a moment. All we really care about is that the contract is fulfilled with the interfaces -- that is, that the class implements the members that are specified by the interfaces. If it turns out that the Save method of ISaveable and the Save method of IPersistable can have the same implementation in our class, then that's perfectly fine. The interfaces just care that the Save method is there.
To see that everything is fine, let's put together a quick console app that shows the different ways that we can call the Save method:

The first section creates 3 variables -- one each for the Implementation class, the ISaveable interface, and the IPersistable interface. The first three WriteLine calls show the output of calling Save with each of these variables.
The last three WriteLine calls show what happens when we cast the Implementation class to the interface and then call Save. Our output from this app is no real surprise:
Since we only have a single Save implementation, that is the output for each of the calls. Again, if this meets our functional needs, then we do not need to explicitly implement the interfaces.
Explicit Implementation
If we decide that the functionality for the interface implementations need to be different, then we can explicitly implement the interface. If we were to do this for both interfaces of our Implementation class, it would look something like this:

If you right-click on "ISaveable" and select "Explicitly Implement Interface", you will get the "string ISaveable.Save()" stub. If we do the same for the IPersistable interface, we end up with three different implementations of the Save method.
Let's take a look at the output from our console app now (the code for the console app remains the same, only the Implementation class has been updated):
Notice the difference. If we call Save on the "Implementation" variable, we get different results than if we call Save on the "ISaveable" variable or the "IPersistable" variable. The same is true if we take our "Implementation" variable and cast it to the different interface types.
We can also mix-and-match the non-explicit and explicit implementation. If we wanted, we could explicitly implement some members, but not others. The non-explicit implementations would behave like the previous sample (where we had no explicit implementations) and the explicit would behave like this sample.
Explicit Implementation May Be Required
In the samples above, explicit implementation is optional -- it is dependent upon our business needs. But there are situations where explicit implementation may be required. What if the signatures of the interface members don't quite match?

Notice that one of the Save methods returns void and the other returns string. This means that we would run into problems if we tried to do a non-explicit implementation. That's because we are not allowed to overload methods in a class based on the return types alone; they need different parameters in order to be overloaded. This means that in our implementation we must have at least one explicit implementation:

Here we have explicitly implemented the IPersistable Save method. In this case, we are simply calling the main Save method (which has the ISaveable signature) because our functionality is the same for our simple example.
Wrap Up
So, what we've seen is that implementing an interface explicitly is optional in a number of situations. If the implementation is the same, then we can just use a non-explicit implementation. Explicit implementation allows us to have different functionality for each interface implementation, and it also allows us to disambiguate interface members that may have signatures that differ in return value only.
Interfaces are a powerful tool in the .NET developer's toolbox. They allow us to add abstraction to our code, let our code be more extensible, and add seams to our code that can facilitate fakes and mocks for unit testing. Explicit implementation is another aspect of interfaces that we can use when we have multiple interfaces with the same or similar members.
Happy Coding!
Sunday, March 18, 2012
Book Review: Programming Razor
Programming Razor by Jess Chadwick (O'Reilly) is a short book at only 99 pages, but it is long enough to provide the information that I was looking for. The book covers using Razor (a web templating syntax) with ASP.NET MVC and WebMatrix. My background: I've done some ASP.NET MVC programming (with the Web Forms view engine) and wanted to get started using the Razor view engine. Note: I got this book for "free" as a user group raffle prize, so I did not pay the cover price (just the price of the raffle tickets).
This book assumes that you are familiar with the development environments (WebMatrix and ASP.NET MVC). It only covers how Razor can be used with these tools and does not give you an introduction to the tools themselves. Again, this is what I was looking for -- how to use Razor syntax.
The parts I found most interesting were in the introduction. This chapter shows how you (as the developer) mix HTML markup with C# (or VB) code to create your web pages. The introduction describes how the Razor parser figures out which parts are markup and which parts are code. It also shows how to give the Razor parser hints on differentiating the markup and code in areas that may be ambiguous. This really gave me the information that I needed to move forward with Razor.
The next two chapters were about using Razor with WebMatrix to build a blog. Fortunately, I had just attended a user group where Alice Pang presented WebMatrix (Alice is a WebMatrix Technical Evangelist for Microsoft). Before that session, I really didn't know what WebMatrix was for or how to use it. If you are interested in WebMatrix, Alice's blog is a great place to get started: http://blogs.msdn.com/b/alicerp/.
With that said, unfortunately, the examples in Programming Razor are a bit of a mess. I tried to follow along with the blog sample in WebMatrix and ran into some issues once the database portions hit. The book does not give enough information about the database fields; it shows a screenshot of the table column definitions, but not the details. This table definition has 5 columns (all of them non-nullable), yet the SQL in the code only populates 3 of the columns. There is a separate code-snippet that shows how to make sure one of the other columns is populated, but this is never incorporated into the main code samples. I was hoping to be able to follow the code samples to build a working (simple) app but was unable to. I also had some build issues here; if I was more familiar with WebMatrix, I may have been able to troubleshoot my way out of this. After this bit of frustration, I did not try to follow any further code samples.
The next chapter is about using Razor with ASP.NET MVC 3. This chapter walked through the steps of building blog pages similar to the WebMatrix sample. I came across some inconsistencies in the code samples in this chapter as well. For example, there were simple code blocks described and the sample would include code that was not described until the following section. Although I did not follow along with the code samples, I could see the inconsistencies that cropped up.
The final two chapters cover the Razor API and Advanced Techniques. I must admit that I sort of skimmed through these chapters. I was more interested in the basics of Razor which were described in the previous chapters, and not so much on how I can pre-compile my templates or extend the default Razor view classes.
So, overall, I did get the information that I was looking for from Programming Razor, however, I am very disappointed with the quality of the code samples. Had I paid full price for this ($19.99), I would have been rather upset. With that said, had I gotten the book for $7 or $8, I probably would have been satisfied with the value. I think the book does have value, and I hope that there is a version with more consistent sample code available in the future.
Happy Coding!
Wednesday, March 14, 2012
So Cal .NET Architecture Users Group
For those of you in the Orange County area, I'll be speaking at the So Cal .NET Architecture Users Group tomorrow night (March 15th). Details are available here: So Cal .NET Architecture Users Group.
The topic is IEnumerable, ISaveable, IDontGetIt: Understanding .NET Interfaces. Hope to see you there.
Happy Coding!
The topic is IEnumerable, ISaveable, IDontGetIt: Understanding .NET Interfaces. Hope to see you there.
Happy Coding!
Tuesday, March 13, 2012
XAML Tip: Gradients
XAML makes a lot of things easier. Technically, everything you can do in XAML can also be done in other UI platforms, but XAML just makes it so simple that you're more likely to do them. What this also means is that we need to think a bit differently when it comes to designing our UIs.
Gradients in the Real World
First, I'll start by saying that I am not a designer; most of these tips have come people way smarter than I am. Personally, I like gradients -- probably a little bit too much. They have the ability to make some things look more natural.
There are no solid colors in the real world. Think about this for a moment. There are a lot of colors that we perceive as being solid, but when we really look at them, there is some sort of variation (from top to bottom, from side to side, or from some arbitrary angle) based on how the light hits the object. Because of this, we can add gradients to our applications to make them look more natural; they can also add a bit of visual interest as well.
Gradients in XAML
XAML makes it very easy to add a gradient. All we need to do is create a gradient brush, and we have a couple of options for that: LinearGradientBrush and RadialGradientBrush. The LinearGradientBrush lets us create gradients that move evenly from top to bottom, from left ot right, or from one side to another at whatever angle we choose. The RadialGradientBrush starts at a point and radiates outward (you can think about this as the highlight that you see on the surface of a sphere).
When you create the gradient brush, you specify the gradient stops. This is how you let XAML know where each color should be along the continuum. If you've taken a look at my samples, you know that I have a particular gradient background that I always use. (I'm not recommending this. It's something that I'm used to that doesn't look too bad.)
Here's the gradient definition:

And what it looks like:

What this means: the start point is the starting point for our gradient. In this case, we are using point "0,0" which is at the top-right of the control. The end point "1,1" specifies the bottom-left corner. So, we will end up with a diagonal gradient. Next we have 2 or more gradient stops. The offset value is a value between 0 and 1 to specify where the color should be. In this case, the first gradient stop is at "0", meaning put Alice Blue at the beginning of the gradient (in this case, the top-right corner). The second gradient stop is at "0.7" which you can translate as 70% across the gradient. This point should be Steel Blue. Since we do not have any additional gradient stops, this color will be "solid" through the end of the gradient.
The great thing about specifying gradients in XAML is that we just specify the gradient stops (where we want our "solid" colors to be). The XAML renderer figures out how to make the smooth transition from one color to the next.
Gradients in the UI
Here's another example of an application that uses gradients as control backgrounds. Note: this is an actual application that I wrote and deployed (but the names have been changed to protect the innocent).

Here you can see gradients in the header, the client area, and the login box. One thing to note about these gradients is that they move from one color to a similar color. In the case of the client area, it moves from "Ivory" to "Moccasin" and back to "Ivory". The login box moves from "Steel Blue" to "Dark Blue" and back to "Steel Blue".
Here is the gradient that's used for the header and login box:

This is a little different from our previous gradient. First, the start point and end point specify that this will be a gradient that goes from top to bottom. This time we have 3 gradient stops. The first one specifies Steel Blue at the start point. The second specifies Dark Blue at the 90% mark. The third goes back to Steel Blue at the 100% mark. We can see this as the color moves gradually from Steel Blue (the lighter blue) to Dark Blue, and then quickly back to Steel Blue.
If we were to move from "Steel Blue" to "Orange", things would look a little strange. Think about the gradients that we see in nature. We see subtle differences in colors -- moving from white to gray, or from lemon yellow to a darker yellow. If we create a jarring gradient, then it has the same effect as a rainbow wig -- attention getting, jarring, and unnatural.
Subtler Gradients
In addition to using gradients for control backgrounds, we can also use them more subtly. Take a look at the following screenshot:

Can you tell how this differs from the screenshot above? If you're anything like me, you can see a difference and maybe have a preference, but you have difficulty pointing out what the difference is. Here's are side-by-side comparisons of the affected area:


The difference is that we applied a gradient to the text of the application name. The great thing about XAML is that it makes this incredibly easy. In fact, for this sample, we're using the same gradient for the header, the login box, and the application name. This gradient is stored as an application resource in the App.xaml file. This makes it easy to share across our screens (and also very easy to update if we change our design).
We'll be looking at this application in a little more detail in future posts. At that point, we'll see a few more cool XAML features and how it can add value to our UI.
Happy Coding!
Gradients in the Real World
First, I'll start by saying that I am not a designer; most of these tips have come people way smarter than I am. Personally, I like gradients -- probably a little bit too much. They have the ability to make some things look more natural.
There are no solid colors in the real world. Think about this for a moment. There are a lot of colors that we perceive as being solid, but when we really look at them, there is some sort of variation (from top to bottom, from side to side, or from some arbitrary angle) based on how the light hits the object. Because of this, we can add gradients to our applications to make them look more natural; they can also add a bit of visual interest as well.
Gradients in XAML
XAML makes it very easy to add a gradient. All we need to do is create a gradient brush, and we have a couple of options for that: LinearGradientBrush and RadialGradientBrush. The LinearGradientBrush lets us create gradients that move evenly from top to bottom, from left ot right, or from one side to another at whatever angle we choose. The RadialGradientBrush starts at a point and radiates outward (you can think about this as the highlight that you see on the surface of a sphere).
When you create the gradient brush, you specify the gradient stops. This is how you let XAML know where each color should be along the continuum. If you've taken a look at my samples, you know that I have a particular gradient background that I always use. (I'm not recommending this. It's something that I'm used to that doesn't look too bad.)
Here's the gradient definition:

And what it looks like:
What this means: the start point is the starting point for our gradient. In this case, we are using point "0,0" which is at the top-right of the control. The end point "1,1" specifies the bottom-left corner. So, we will end up with a diagonal gradient. Next we have 2 or more gradient stops. The offset value is a value between 0 and 1 to specify where the color should be. In this case, the first gradient stop is at "0", meaning put Alice Blue at the beginning of the gradient (in this case, the top-right corner). The second gradient stop is at "0.7" which you can translate as 70% across the gradient. This point should be Steel Blue. Since we do not have any additional gradient stops, this color will be "solid" through the end of the gradient.
The great thing about specifying gradients in XAML is that we just specify the gradient stops (where we want our "solid" colors to be). The XAML renderer figures out how to make the smooth transition from one color to the next.
Gradients in the UI
Here's another example of an application that uses gradients as control backgrounds. Note: this is an actual application that I wrote and deployed (but the names have been changed to protect the innocent).

Here you can see gradients in the header, the client area, and the login box. One thing to note about these gradients is that they move from one color to a similar color. In the case of the client area, it moves from "Ivory" to "Moccasin" and back to "Ivory". The login box moves from "Steel Blue" to "Dark Blue" and back to "Steel Blue".
Here is the gradient that's used for the header and login box:

This is a little different from our previous gradient. First, the start point and end point specify that this will be a gradient that goes from top to bottom. This time we have 3 gradient stops. The first one specifies Steel Blue at the start point. The second specifies Dark Blue at the 90% mark. The third goes back to Steel Blue at the 100% mark. We can see this as the color moves gradually from Steel Blue (the lighter blue) to Dark Blue, and then quickly back to Steel Blue.
If we were to move from "Steel Blue" to "Orange", things would look a little strange. Think about the gradients that we see in nature. We see subtle differences in colors -- moving from white to gray, or from lemon yellow to a darker yellow. If we create a jarring gradient, then it has the same effect as a rainbow wig -- attention getting, jarring, and unnatural.
Subtler Gradients
In addition to using gradients for control backgrounds, we can also use them more subtly. Take a look at the following screenshot:

Can you tell how this differs from the screenshot above? If you're anything like me, you can see a difference and maybe have a preference, but you have difficulty pointing out what the difference is. Here's are side-by-side comparisons of the affected area:


The difference is that we applied a gradient to the text of the application name. The great thing about XAML is that it makes this incredibly easy. In fact, for this sample, we're using the same gradient for the header, the login box, and the application name. This gradient is stored as an application resource in the App.xaml file. This makes it easy to share across our screens (and also very easy to update if we change our design).
We'll be looking at this application in a little more detail in future posts. At that point, we'll see a few more cool XAML features and how it can add value to our UI.
Happy Coding!
Monday, March 5, 2012
San Diego .NET Developers Group
For those of you in the San Diego area, I'll be speaking at the San Diego .NET Developers Group tomorrow night (March 6th). Details are available here: San Diego .NET Developers Group.
The topic is IEnumerable, ISaveable, IDontGetIt: Understanding .NET Interfaces. We'll take a look at what it means to program to an abstraction rather than a concrete class, see how interfaces can help us accomplish that, and then review some real life examples of how we can use interfaces to make our code more robust and extensible. Hope to see you there.
Happy Coding!
Web Service Proxy Collection Types
SOAP-based web services are self-documenting. This means that tools like Visual Studio can create a proxy class for us based on the service description (generally with WSDL -- the web service definition language).
Collection Types
SOAP web services are designed to be interoperable. This means that we can consume a SOAP web service with whatever development environment we are using (.NET, Java, PHP, etc.) regardless of the language that the web service itself is written in. (The converse is also true - we can write our .NET web services so that they can be easily consumed by other development environments.)
When talking about interoperability, this usually means that we are coding to the lowest common denominator -- meaning that we use the constructs that can be understood by the most development environments. For collections in .NET, we have a tendency to use a generic list such as List<T>. But when thinking about interoperability, we need to consider that generic lists do not exist in every environment, and so we take a step down to an Array object.
When consuming web services, we run into the same issue. The service may expose an Array object as a return type. But we would much rather use a generic list in our code. So, what do we do?
Did You Know? Advanced Proxy Settings
The Visual Studio service proxy generator actually gives us control over the types of collections that are exposed by our proxy. When you select "Add Service Reference" for a project, the resulting dialog has an "Advanced" button. If we click this, we get the following screen:
 If you have already created a service reference, you can also get to this screen by right-clicking on the service reference in the Project Explorer and selecting "Configure Service Reference".
Notice that there is a setting for "Collection Type". The default for this will vary depending on the environment and type of service that we are consuming. For example, the sample above is a SOAP 1.1 service, and so it has defaulted to the Array collection type (System.Array). But we can change this with the drop-down:
 This lets us change from Array to List<T> without having to do any casting or conversion in our code. All of this is handled for us in the proxy that Visual Studio creates for us. Any Arrays that are specified in the service (either as parameters or return types) will be converted to generic lists automatically. Pretty cool, huh?
You can see that we have a number of options to choose from. The List<T> (System.Collections.Generic.List) is just one of them. We could also use an ObservableCollection (which has special features in the XAML world) or one of the other types that meets our needs.
If the services are using Dictionaries, there is a similar option to choose the specific dictionary type -- whether a sorted list, generic dictionary, hashtable, or something else.
SOAP Services Are Still Cool
SOAP services have been getting some bad publicity lately ("They are too verbose") as people move toward REST services. But like everything else in the programming world, there is room for both. Each have advantages and disadvantages; it's our job as developers to weigh those benefits and costs and determine which is appropriate for our situation.
The big advantage to SOAP services is that they are self-describing. This means that we can use tools such as Visual Studio to create a proxy class that makes it extremely easy for us to interact with the service. (Most other development environment have this same sort of WSDL importer tool.)
Visual Studio is a great development environment that gives us quite a bit of control over how the SOAP service proxies are generated. We've seen how we can control the collection types; you can take a look at the "Advanced" features to see what other options are available.
Happy Coding!
Collection Types
SOAP web services are designed to be interoperable. This means that we can consume a SOAP web service with whatever development environment we are using (.NET, Java, PHP, etc.) regardless of the language that the web service itself is written in. (The converse is also true - we can write our .NET web services so that they can be easily consumed by other development environments.)
When talking about interoperability, this usually means that we are coding to the lowest common denominator -- meaning that we use the constructs that can be understood by the most development environments. For collections in .NET, we have a tendency to use a generic list such as List<T>. But when thinking about interoperability, we need to consider that generic lists do not exist in every environment, and so we take a step down to an Array object.
When consuming web services, we run into the same issue. The service may expose an Array object as a return type. But we would much rather use a generic list in our code. So, what do we do?
Did You Know? Advanced Proxy Settings
The Visual Studio service proxy generator actually gives us control over the types of collections that are exposed by our proxy. When you select "Add Service Reference" for a project, the resulting dialog has an "Advanced" button. If we click this, we get the following screen:

Notice that there is a setting for "Collection Type". The default for this will vary depending on the environment and type of service that we are consuming. For example, the sample above is a SOAP 1.1 service, and so it has defaulted to the Array collection type (System.Array). But we can change this with the drop-down:

You can see that we have a number of options to choose from. The List<T> (System.Collections.Generic.List) is just one of them. We could also use an ObservableCollection (which has special features in the XAML world) or one of the other types that meets our needs.
If the services are using Dictionaries, there is a similar option to choose the specific dictionary type -- whether a sorted list, generic dictionary, hashtable, or something else.
SOAP Services Are Still Cool
SOAP services have been getting some bad publicity lately ("They are too verbose") as people move toward REST services. But like everything else in the programming world, there is room for both. Each have advantages and disadvantages; it's our job as developers to weigh those benefits and costs and determine which is appropriate for our situation.
The big advantage to SOAP services is that they are self-describing. This means that we can use tools such as Visual Studio to create a proxy class that makes it extremely easy for us to interact with the service. (Most other development environment have this same sort of WSDL importer tool.)
Visual Studio is a great development environment that gives us quite a bit of control over how the SOAP service proxies are generated. We've seen how we can control the collection types; you can take a look at the "Advanced" features to see what other options are available.
Happy Coding!
Subscribe to:
Posts (Atom)